Popular Mechanics, March 1952
By Austin H. Phelps
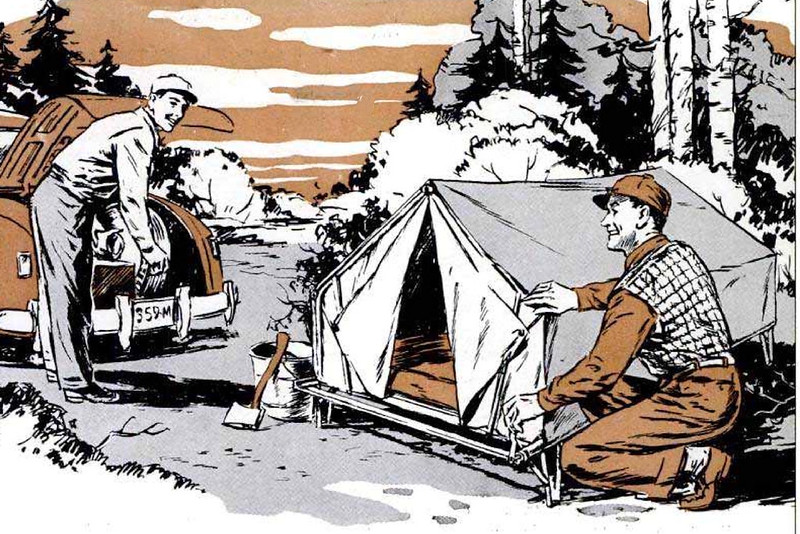
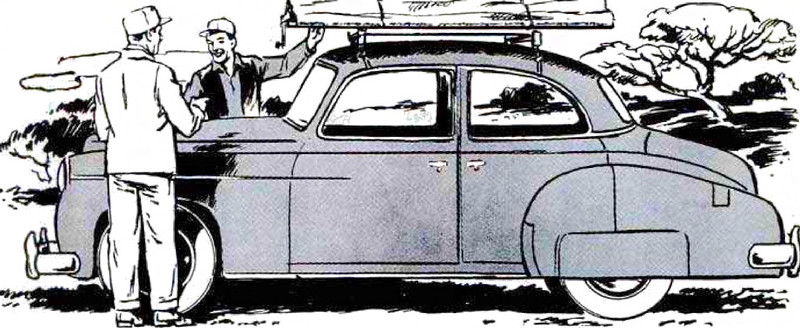
VACATION campers, hunters and others who prefer to “go light” on both long and short trips will appreciate the compact utility of this bed-tent. It combines the weather protection of a sturdy tent and the comfort of a four-poster bed in one unit which folds into a flat bundle easily transported on any car-top carrier. The mattress and all bedding remain inside when the unit is folded for transport. Although, as dimensioned, the bed frame will accommodate an innerspring mattress of three-quarter size, most campers will prefer an air mattress, as it is much lighter, more compact, and easier to keep clean. Other bedding in addition to the mattress can be whatever the climate and season require. It takes only a few moments to ready the unit for occupancy. There are no stakes to drive and no ridgepole to string. Merely unstrap the unit and slide it from the car carrier, open the folding legs, pull up the self-locking ridgepole and there you are.
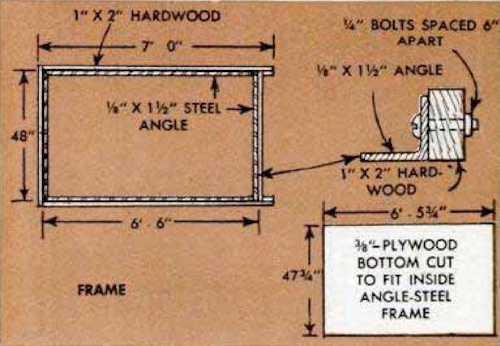
The first step in the construction is to build the angle-steel frame shown in the plan detail below. Cut the side and end-pieces to length and square the ends with a file. Position the pieces and mark and center-punch for bolt holes at the corners. Note that the frame is assembled with the angle web up on both the sides and ends. Drill holes for the corner bolts and also drill holes in the vertical webs for screws which hold hardwood strips. The strips are attached to the angles as detailed, using short flat-headed screws. Next, cut the plywood bottom and headboard, but, before installing the bottom, make sure that the frame is square. Then attach the plywood bottom with 1/4-in. flat-headed stove bolts with the heads countersunk in the wood and the nuts turned on from the bottom so that they bear against the steel angle.
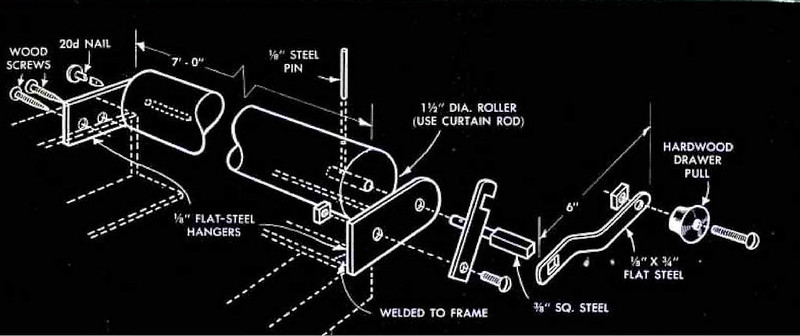
Note in the details on the opposite page that there is a headboard cut from 3/8-in. plywood and placed at the head of the bed inside the frame. Next, bolt on the wooden facing strips, noting that the carrying-handle brackets at the rear of the bed frame fit over the facing strips. Weld hanger brackets at the front and rear of the frame on the right-hand side to form bearing brackets for the roller as in the lower de-tail on the opposite page.
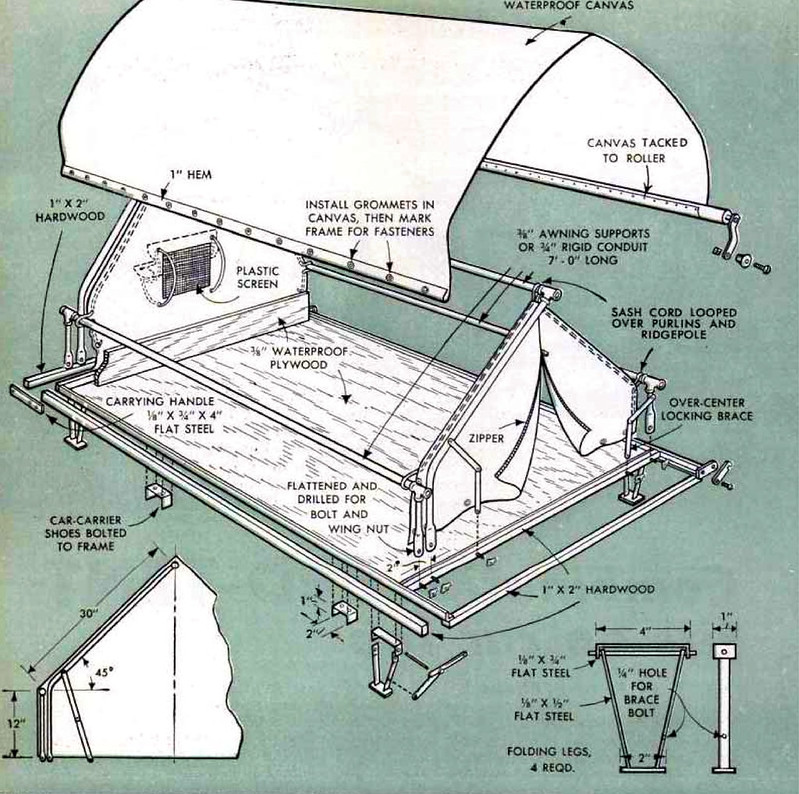
Note in the detail that the length of the ridgepole and the purlins is given as 7 ft., but, before cutting material, take careful measurements, as this dimension may vary. Flatten the ends of the conduit uprights in a vise, round the ends with a file and drill for 1/4-in. bolts. Make the 45-deg. bends in the ridgepole supports. Then assemble the three units and clamp them in position on the frame so that you can locate the holes for the purlin frames, the ridgepole, and also the holes for the over-center braces. After these parts have been bolted in place —note that all bolts are provided with wing nuts — assemble the roller, or winding drum, as in the lower details on the opposite page. As will be seen from the detail, the roller is provided with a removable crank and a ratchet-type lock which permits tightening the canvas to a uniform tension and holding the adjustment.
Make four folding legs from flat steel as in the center right-hand detail on the opposite page. The leg brackets are bolted to the underside of the angle-steel frame at the corners and are provided with folding braces. At this stage the bed is placed on a level floor and the purlins and ridgepole are raised so that accurate measurements can be taken for cutting the canvas covering to fit. Note that the covering is attached to the frame on the left side with grommets and fasteners and that the right-hand edge is tacked to the roller. When tacking the canvas to the roller, allowance must be made for shrinkage of the fabric. The canvas closure at the head of the bed is provided with a plastic-screened opening and a separate canvas closure which is opened and closed by means of a sash, or awning, cord as shown. A slide fastener provides a double fly for opening the front of the tent covering. Both canvas ends are fastened at the bottom with grommets and are held taut with cord looped over the purlins and ridgepole. Locate the car-carrier shoes by placing the folded unit on the car-top carrier and marking pencil lines to indicate the position of the shoes. After bending to the required size from 1/8 x 1-in. flat iron, the shoes are attached to the bot-tom of the bed with stove bolts. Apply two coats of spar varnish to the plywood bot-tom, headboard and wooden rails and enamel metal parts in whatever color desired.


Comments on this entry are closed.
This is the neatest thing. My boys and husband would love to make something like this. I wonder if it could be slightly modified to be able to leave on top of the car adding a ladder to access.